Very first, I'd like to welcome brand-new team member, Jennifer Tripp! You are such a gracious hostess and a delight to work with! Welcome!
How cute is this?! Do you recognize the purse?
How about now when it's a travel bag?
Okay, I'll tell you..... it's the coffee mug die!
That's right - the great little coffee mug from Scentsational Season in the Holiday catalog.
Turned on it's side it makes the sweetest purse or suitcase.
That's right - the great little coffee mug from Scentsational Season in the Holiday catalog.
Turned on it's side it makes the sweetest purse or suitcase.
I just happen to be going to a purse sewing party tonight and am taking them as favors for the gals! Hopefully I'll be able to show you my ultra-darling purse tomorrow.
I've included a mini tutorial at the end of this post just for you!
I've included a mini tutorial at the end of this post just for you!
Scentsational Season Bundle
129946c
129945w
129946c
129945w
But first - take a look at this brand new product! The Stampin' Trimmer!

The brand new Stampin' Trimmer has so many great features!
- A full 12" cutting and scoring track
- A cutting track that locks into place
- A specially designed cutting track and handles for stable and straight cuts
- A full ruler, including 1/4" grid lines that won't wear off
- A compartment under the base to store blades and more
- Item #126889 $ 29.95
- Put it on your Christmas list!
So many fun new items to order today -simply order online by clicking here!
And now on to the tutorial....
Supplies: (per purse)
Card stock: (2) 2" x 2-1/2"
(1) 1" x 1-1/2" scored @ 1/2" and 1"
DSP: (1) 1-1/8" x 3" (for candy bar)
1. Lay both 2" x 2-1/2" piece of card stock together and die
cut with coffee mug die.( I'm able to cut both at the same
time with my Big Shot!)
cut with coffee mug die.( I'm able to cut both at the same
time with my Big Shot!)
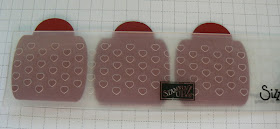
2.Emboss "purses" using the Adorning Accents embossing
folder - three purse fronts can be embossed at the same
time.
folder - three purse fronts can be embossed at the same
time.

3. Punch a hole at the top of each purse using the 1/2"
Circle Punch. Adhere Sticky Strip onto the 1" x 1-1/2"
piece of card stock.
4. Adhere liner to inside of purse.
purse securing with a Glue Dot. Embellish purse as
desired!


brilliant, Brillant, BRILLANT!!!!!!!
ReplyDeleteThis is stinkin' adorable!! Thanks so much for sharing!!
ReplyDelete~Alicia
Cute, cute, cute!! I love it. I think I'll share these at Club this month!
ReplyDeleteOh.My.Gosh you are ingenious! Thank you for the fun tutorial!
ReplyDeleteSo cute! Love the mini purse idea!
ReplyDeletePenny, pure genius!! I'm so happy I follow your blog! Thanks for the instructions as well!
ReplyDeleteThank you so much for sharing.... This is very, very cute....
ReplyDeleteFaith
OMG, OMG,OMG!!! Can't wait to try this incredibly clever idea....I love out of the box thinkers!
ReplyDeleteOh my goodness! This is just too clever and cute! Thanks so much for sharing, Penny!
ReplyDeleteHoly Smokes!!! I see some of these in my Girl Scout Troop's future, thanks so much for sharing.
ReplyDeleteYou da bomb girl! Love it and totally going to be making these.
ReplyDeleteHugs, Di
THAT is so super fun! What stamp set is the 'thank you' from?
ReplyDeleteAdorable!
ReplyDeleteLorie,
ReplyDeleteIt's from Perfectly Preserved. It just hides the snowflake so you can use the mug year round.
Hi! So adorable! I just love it! Where can I find this die? I can't wait to try it. Aloha! Donna
ReplyDelete