Showing posts with label Bird Builder punch. Show all posts

Friday, May 11, 2012

Thank You to Teachers!

Just a few more weeks and the kids will be home for the summer. Lazy days full of sunshine and play are right around the corner! But first, a big thank you to all the fantastic teachers!

  A simple notepad dressed up in Crumb Cake and Real Red, topped off with ribbon, is a great end-of-the-year thank you. A sweet treat made from the Top Note Die and a simple little 3 x 3 card complete with coordinating envelope finish off the set.

Begin with two Top Note Dies cut from Crumb Cake card stock. Score at 3/4" along bottom side of each. Overlap and adhere. Punch a 1" circle from lower right hand side. Punch a wing from Lucky Limeade using the Bird Builder Punch (leaf). I ran mine through the Crimper. I hand cut a stem. Add a simple tag. Use the 1/2" Circle Punch to create a space for the ribbon to tie. Candy in a cellophane bag create the "red apple". 


It doesn't get much simpler than this!
Crumb Cake, First Edition Specialty
DSP and Real Red. Top it off with a
little Linen Thread accented with
with a couple of hearts.

Coordinate envelope created from First Edition Specialty DSP. Begin with a 5" square, diagonally score each side @ 2-1/4" using the Simple Scored Diagonal Plate. Trim the little "V" at center point of each side. Fold each side in - voila! An envelope!

The "NOTES" on the notepad were created using the Billboard Strip Die 114510 and Big Shot! Machine.


Wednesday, May 9, 2012

Hearts and Birds

Just a quick little love note today - I ran a piece of burlap through the Big Shot! with the Hearts Collection Framelits Die. Added an embossed bird, a few flowers, pearls and ribbon - simple, simple!

I created a double border with Summer Smooches DSP using the Eyelet Border punch - love that punch! At first glance the Summer Smooches DSP is bright and packs a punch, but can easily be softened using neutrals. It's part of the sneak peek from the catalog launching June 1st.
Here's another idea using the Eyelet Border Punch - tags for sentiments created any length you choose! Begin with a piece of cardstock the desired width. Center piece in the border punch - repeat with opposite side. Cut apart using one eyelet as shown below or wider to create a border as shown in the card above.  
Click here for another idea! (check out the Thanks tag)

Monday, April 23, 2012

Just a Note

A little embossing, a little tuille, a button and  some pearls. This card was created using Twitterpated DSP, Basic Grey, Lucky Limeade and Baja Breeze.

I'm off to Canada for a few days to be with family and  to visit my sister's scrapbooking store, Scrap and Bean, in Edmonton, AB for the first time! Want to visit with me - click here


I'll be right back to creating and posting when I return.

Have fun stamping!

Saturday, April 21, 2012

Summer Smooches Garden Tote Class - Now Available as a Kit!

    Welcome to my Summer Smooches Garden Tote Kit! 

I recently taught this class and we had such a great time that I've decided to offer it as a kit!

It includes four cards, four envelopes, an original Garden Tote, embellished with a fabric scarf, and the new Petite Purse!  It's created using Summer Smooches DSP and fabric, along with the Bright Blossoms stamp set - all brand new products from Stampin' Up! They're crisp, bright and summery!


Your kit contains all the pre-cut paper and fabric along with necessary embellishments to complete the six projects shown. Also included is a 26 page tutorial, available for download, complete with clearly written step-by-step instructions and photos. Kits mail within 3 business days.
I've also included a bonus pattern and additional ideas for cards! All you need to do is grab a cup of coffee and start stampin'! What a great way to spend a spring day! Or ... get together with some favorite friends  and you have a class ready to go!
Tutorial only is also available for immediate download.
 Note: Kit papers may vary slightly. All will be from Summer Smooches Designer Series Paper and in the same color group as shown.


Tutorial Only
$3.95 immediate download


Click here to view the entire Summer Smooches product line!                                             

Wednesday, March 21, 2012

Bird Feeder Treat Box - Free Tutorial


Oh my! In the last magazine Stampin' Up! published specifically for their demonstrators (all kinds of perks!) they gave directions for a treat box that I thought was too cute!
However, as often happens, when I get an idea it ends up being quite different from the original and this project was no different. First, I thought I would do the entire box using Window Sheets so you could see all the goodies inside - but I happened to be out and had to place an order for more.... so, while I was waiting I used the very last little bit of Mocha Morning (polka dot) I had left to create this delightful little number. You kind of hold your breath when you use the last of something - ever done that?  
This treat box is filled with chocolate covered coffee beans - yummy!


Here are the directions as I made it:

Cardstock:
Mocha Morning DSP                 122366   (1) 4" x 6-1/2"
                                                            (2) 3-1/2" x 3-1/2"                                            
Pear Pizazz card stock              119795   (1) 3-1/2" x 4-1/2"
Very Vanilla card stock              101650   (1) 2-1/2" x 6"
Early Espresso card stock         119686   (1) 4" x 4"
Window Sheets                         114323   (1) 1-1/8" x 4"

Ink:
Sahara Sand                             105208

Embellishments:
Brads, Brights                             119740  (1)
Chocolate Chip Satin Ribbon        124327  (10")

Tools:
Big Shot! Machine                       113439
Island floral Die                            118871
Scallop Circle #2 Die                   113469
Bird Builder Punch                       117191
Blossom Bouquet Triple Layer
Punch                                         122464
Crop-a-dile                                   108362
3/4" Circle Punch                         119873
Paper Snips                                 103579
Sticky Strip                                  104294
Stampin' Dimensionals                  104430
Glue Dots                                    103683
Bone Folder                                 102300
Stampin' Sponge                          101610


Directions:
1) Score Mocha Morning DSP at 1-1/8", 2-1/4", 3-3/8", 4-1/2" and 5-5/8".
2) Using the 3/4" Circle Punch, punch one hole centered between the 2-1/4" x 3-3/8" score
     lines, with the punch placed as far in as paper will allow. Refer to picture below.

3) Using Snail Adhesive, adhere Window Sheet to back side of 3/4" hole.

4) Create tube by adhering with Sticky Strip along 3/4" side as pictured below.

5) Using Mocha Morning DSP (3-1/2" x 3-1/2") cut two flowers using the Big Shot! Machine     
    and the Island Floral Die. With Crop-a-dile, punch 1/4" hole through the center of one flower
    to accomodate ribbon. the other flower is for the bottom and will have a tiny hole in it which
    was created by the die. It shouldn't be a problem - you can always put your "created by"
    sticker over it if you want to hide it. That's what I did :)

6) Using Bone Folder, crease each petal on both flowers so they each form a hexagon.
7) Using the Blossom Bouquet Triple Layer Punch and Very Vanilla card stock, punch out three 
     flowers using the setting that creates a solid flower. Punch 1/4" holes in center of each flower
      using Crop-a-dile.
8) Using Paper Snips, cut each flower to create petals as pictured below. Sponge front and
     back of flowers using Sahara Sand ink and Stampin' Sponge. Use Bone Folder to curve
     petals. Changes the look of them quickly, doesn't it?

9) Using Pear Pizazz card stock and the Bird Builder Punch, punch out three sets of leaves.
     Conserve paper as shown below. Adhere leaves  to top of treat holder with Glue Dots.
 10)Adhere flowers to top of treat box using Glue Dots. Tie ribbon through to create a loop and
     secure with a knot underneath top.

11) Apply Sticky Strip on inside of each petal on both DSP flowers and adhere one to top of
      box - fill box with treats and adhere the final flower to the bottom of box.

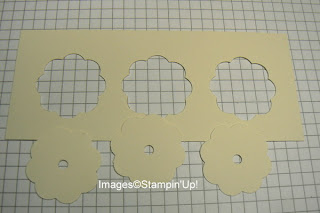
12) Using Early Espresso card stock and the Scallop Circle #2 Die cut out one of the large
       scalloped circles. Adhere to bottom of box using Sticky Strip.


Wednesday, February 8, 2012

Thank you's


Simple little thank you's for a group of gals that made my workshop so much fun!  It's always good to be surrounded by great friends and gals that are enthusiastic about stampin'!  Thanks for a great afternoon!

Wednesday, August 10, 2011

Back to School!

Well, it's almost that time again.... back to school!
This is my first in a series of delightful cards to celebrate back to school for your children, friends or teachers.

As usual, I was inspired by a card (I loved the apple!) that was showcased in a wonderful magazine available only to Stampin' Up! demonstrators ..... there are many, many benefits of becoming a demonstrator! click here for more info

And as usual, I changed it up quite a bit.  I will take credit for the pencil and the envelope made from a lunch bag - aren't they ever so cute?

Apple:  I hand drew, cutting each layer about an 1/8" - 1/4" inch smaller than the previous one - you can do it, I know you can! Start with an "apple" approx. 3" x 3-12". Dampen the apple layers (except bottom one) and scrunch up, unfold and let dry before adhering them together.

Seeds: are created by cutting a heart (Small Heart punch) in half, using Early Espresso c/s

Leaf: created from the wing (Bird Builder punch), using Old Olive c/s

Pencil: Cut a 3/4" strip each of the following cardstock:
Blushing Bride 3-1/8" long
Crumb Cake    3" long
Daffodil Delight 2-1/4" long
Basic Black   1/2" long
Adhere Crumb Cake on top of Blushing Bride - this will create the "eraser"
Adhere Daffodil Delight on top of Crumb Cake, placing up against "eraser"
Adhere Basic Black to end of Crumb Cake to create "lead" and cut into a point
Supplies:
Night of Navy ink
Cardstock: Blushing Bride, Crumb Cake, Daffodil Delight, Night of Navy, Basic Black, Old Olive, Real Red, Whisper White
Just Add Cake DSP
Clips Assortment #112580
Friendly Phrases #126151
Hemp Twine #100982
Bird Builder punch #117191
Small Heart punch 117193

Envelope:
Elementary Alphabet wheel #123229
Pretty Postage stamp set #123097
Scallop Edge Border #119882

I created the envelope using a regular lunch bag. Cut the bottom off, fold over and adhere closed with Sticky Strip. If you don't go too overboard on the embellishments and adhere it closed well, it can actually be mailed!

Now off to school!