Thursday, May 31, 2012

Petal Flower Card

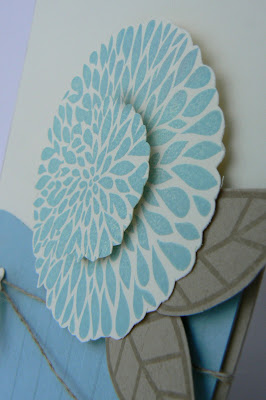
I think this 5-Petal Flower punch is so much fun - this time I punched it out on the card front and then added a flower made from the same punch. Dressed it up with a button and ribbon and a simple card is born! Tomorrow is the last day to order it! Click here to get that taken care of.

The sentiment banner is die cut using the Bitty Banners Framelit Die - available June 1st! I once again punched the banner from the card front and then flipped the cut out piece of card stock, stamped a sentiment and adhered it with Stampin' Dimensionals.
And the inside using Betsy's Blossoms stamp set for the leaves and flower. Shooters about that wonderful grey fuzzy area - it happens to be in my lens! It always shows up at the most inconvenient times. Couldn't photo fix it for the life of me! I did okay on the others tho', me thinks. The actual card looks fine - smile!

Wednesday, May 30, 2012

Farewell Mocha Morning!

I invite you on a little journey today as I say farewell to Mocha Morning DSP. As you may know, the new 2012 Stampin' Up! catalog debuts on June 1st, so the last day to order this amazing DSP is tomorrow!

I decided to go through my scraps, and I do mean scraps, of this delightful paper and create a card as a parting gesture. As the card evolved I decided to share the process - on the off chance that you think it all comes together perfectly the first time! So here it goes!

               First the inspiration - I found it browsing through a magazine  - nice, huh? But because my scraps were so small and it was hard to trim all the corners, I decided on circles. I used Very Vanilla for the background. I also added a little left over Well Worn DSP.
Okay, but quite blah....

I decided to give it some warmth using an Early Espresso card base. The circles are just laying there for right now. Oh, I've learned not to adhere things too quickly! Okay, a little nicer....

I sponged the edges of all the circles with Crumb Cake ink. Getting better...


I was trying to decide if I should emboss the background or what. Decided on "or what"! Using the Simply Scored Tool, I scored two horizontal lines just above where the circles lay. I wanted to keep the card fairly clean so that worked for me!


So now to add a little element, I used Linen Thread between the score lines. I adhered it only to the back of the Very Vanilla card stock. Well, on the second card I did! The first one I had adhered the card front to the base already using Stampin' Dimensionals, so had to use my Paper Snips and a couple of glue dots and wedge it into place! Didn't I just say I had learned not to adhere things in place too quickly? Ha!


So, now you can adhere the card front with Stampin' Dimensionals and adhere your circles of DSP in place. Some are adhered with Snail adhesive, others with Stampin' Dimensionals to add a little depth.

Big oops! Well, my original didn't turn out quite this badly, but I did it over to show you what happened - I stamped the sentiment on crooked! (Lesson learned: stamp first to make sure it's picture perfect and then assemble and adhere your card together.) But, wait, there's a cure! I just restamped the sentiment (love the sentiment - and it's staying for the new cattie!), cut it out as a banner and adhered it on top! The banner die is available as a set on June 1st!


And we're done! Wouldn't it be great to send with a Starbuck's gift card tucked inside? Oh, I know just who this needs to go to! I'll just adhere a few circles to the front of an envelope and off it goes! Thanks for hanging out with me today!


Tuesday, May 29, 2012

Wow - You're the Best!

Just a quick card this evening using Floral District DSP. Love the bright, sunny colors! Perfect for the person who really is a "Wow, You're the Best". How grateful we are to have those kind of individuals in our lives!

Are you ready for the 2012 Stampin' Up! catalog - it debuts on June 1st! It's full of goodies - contact me to receive one in the mail.

I hope you had a wonderful Memorial Day weekend. We had beautiful weather, good friends, good times!

Sunday, May 27, 2012

Laughter....

A simple card today, as a reminder that "laughter is by definition healthy!"

Whether it's laughing at something funny or learning to laugh at yourself - try to add a little laughter to your life!

I stamped the largest flower from Betsy's Blossoms behind the DSP flower for a little added interest. I'm lovin' the new Apothecary Framelits - available for order June 1st! 

Whisper White card stock
Rich Razzleberry card stock
Floral District DSP
Fun Flower Bigz L Die
Apothecary Accents Framelits
Word Play stamp set
Betsy's Blossoms stamp set

Saturday, May 26, 2012

A Daring Adventure!

Here's a card that I case'd (oh, yeah!)  from the brand new 2012 Stampin' Up! Catalog. The complete card was done digitally - I'm hooked! 

I absolutely love how it enables you to change the size of the stamp sets. For instance, the typed area is actually a background stamp that I reduced and then repeated twice to fill in behind the banner.

There are no embellishments on this card - but I don't think they're missed! I think this could qualify for  a graduation card, don't you?

Are you ready to try My Digital Studio? For free? Don't wait another day to download your free 30 day trial. It's too fun - really! Click here for more info and a great video!

Thursday, May 24, 2012


Simple with beachy kind of colors! Using the largest blossom from Betsy's Blossoms, I stamped it twice. I used one full blossom and then cut just the center area out of the second blossom to add a little dimension. The leaves were stamped on Crumb Cake card stock with Crumb Cake ink. I hand cut the Baja Breeze card stock at a bit of an angle and then embossed it with the Stripes embossing folder. Tied up with a little Linen thread and a "hello" tag finish it off. And now a close up...

Tuesday, May 22, 2012

Do you love creating wonderful cards, scrapbook pages and paper crafts as much as I do?

Have you ever thought of creating an income while having ever so much fun?

Have you considered having an online business?

Stampin' Up! is the perfect solution if you've answered "yes" to any of the above!

And to make it easier than ever, they are offering $125.00 of your choice of Stampin' Up! products for only $99.00. That's right - you choose what comes in your Starter Kit! 
Whether you're a traditional stamper or you've chosen to go Digital, the kit can be designed by you.
I'd love to help you create an online Stampin' Up! business!

Monday, May 21, 2012

Fun Flower Package


I had a couple of thank you's to send out that needed something extra with it - like some of our great product. I chose some Designer Buttons to hide between the layers of this flower!


 I began by cutting a large scalloped circle using the Big Shot! and the Scalloped Circle #2 Die (only available until May 31st!). I then adhered a Shaker Frame filled with Designer Buttons! It was topped off with two flowers created with the Fun Flowers Bigz L Die and a Brights Designer Button. You could fill it with anything - brads, ribbon, candy, die cut flowers....

Here's a side view - now you'd never have a reason to actually look at it like this but
I wanted to show you to help explain how I sandwiched the pieces.   


And another color scheme!


   Floral District DSP    -   Rich Razzleberry card stock     - Calypso Coral card stock
                                     Designer Buttons, Brights    -       Shaker Frames
                                    Fun Flowers Bigz L Die    -  Scalloped Circle #2 Die

Wednesday, May 16, 2012

And There's More!


So, what do you think of this new paper? It's one of the all-new Floral District Designer Series papers. Pretty, isn't it?
It teams up with Rich Razzleberry, Baja Breeze and Daffodil Delight. I think it's great and look forward to using it many, many times!

It's a little hard to see in this picture, but the card also sports a brand new die cut - a rectangle with a place on each end that's perfect for tying ribbon through. It's one of the  new dies in the Apothecary Accents Framelit collection.

Stay posted - there's more coming every day until you've seen all this paper has to offer! 

Tuesday, May 15, 2012

A Sneak Peek!


So I've been working with my brand new products... so fun!
Scrumptious colors like Raspberry Ripple, Gumball Green and Primrose Petals. This card is using Betsy's Blossoms, a great new stamp set - flowers, birds and a great leaf stamp with almost a tropical feel to it. Love the clean feel of so many of the new products.

Isn't it time for you to get a sneak peek of your own?
Check out the Join the Fun Promo!


I do have to tell you what happened tho'!
The UPS man arrived Thursday afternoon with a box which I knew was my new catalogs. However, because I have been gone and have let the housework go a bit, I was in the middle of cleaning and still had the refrigerator to go. So I sent a text to my upline to make sure someone knew how good I was being by finishing work before play. I was going to finish my work, brew a cuppa and then sit down with no interruptions to browse. I did (it's amazing how fast you can clean when you've got a new cattie waiting for you!), got my cup of coffee and with my 15 yr old daughter watching proceeded to open the "box". It had to be a production - this only happens once a year, right?

Well, here's what I found in the box!


Aarrgghh! Well, these were exciting a year ago! Not so much today! 
So... called Becky - yep, the Becky Roberts cause I had to tell her. Do you want to guess the next part of the story?
I decided I'd sit back down at the computer and look at the cattie again online - the doorbell rings and here's Becky with a brand new catalog for me! I wish I'd gotten a pic of that to share with you!

The happy ending to the story - a call to Stampin' Up! and as always they made it right. Thank you Stampin' Up! and Becky for always making good things happen!


Monday, May 14, 2012

Petite Purse Teacher Thank You!


A truly special teacher is very wise, and sees tomorrow in every child's eyes.  ~Author Unknown
It's the end of another school year and time to say a big thank you to the teachers! Aren't they amazing people? Each of us can think of a teacher that has a positive impact on our lives.

My fifth grade teacher comes to mind - Mr. Filice. He went on to be a superintendent and I'm sure long retired now, but he was wonderful.


This little purse is the perfect little pocket for four or so miniature candy bars - wrapped in coordinating paper for sure.


After making this one along with a coordinating card, II precut the pieces for three more and mailed them off to our grandkids so they could put them together for their teachers.

The Petite Purse Die is so simple and cute. I know I'll be making many more. Do you still need one! Shop now!
                                        
                                                             Petite Purse Die 125606
 Berry Blossoms DSP 122350
   Poppy Parade card stock 119793


Saturday, May 12, 2012

Fresh Flowers and Clean Lines

Are you ready for summer! I certainly am! Felt so good to eat dinner outdoors last night for the first time this year. I think I could pretty much live outdoors.... with a beach, and a chair, and a good book - hah!  I'd come in for a few hours each day to stamp, then right back outside to the sand and the sea.... aaahhhh!

Creating something clean and fresh today. Am patiently (not) waiting for my brand new products to arrive so meanwhile I reached for the amazing Summer Smooches DSP.  I so love this paper - it's crisp and clean and you can use it in so many ways.


And a close up of the flower, which is a button, today. Aren't buttons great? And just wait until you see what beautiful button is available June 1st! Think crystal and vintage. Very, very sweet!


I used a button again! This time the back side of the button is what you see. I use the Designer Series buttons quite often that way, just because they look a little bolder that way.

These cards were created to fit the Small Open-End Envelopes 107286. They are a great little size: 6-3/4" x 3-1/2", and make a nice change.

Dress up the envelope flap by tracing the envelope flap onto coordinating DSP, cut out and adhere. Pretty, pretty!


And my last in this set of three. I love, love the graphic design of this piece of Summer Smooches DSP. Can you imagine how cool it looks paired with black - just wait, that project is coming!

I used the Kindness Matters stamp set for the "Thanks" on each of these cards. I'm so glad it's staying around for another year.

The leaves and blossoms are from Bright Blossoms and will be available June 1st again along with the Summer Smooches DSP. I've had a sneak peek at the new catalog - lots of great new products in store!

Friday, May 11, 2012

Thank You to Teachers!

Just a few more weeks and the kids will be home for the summer. Lazy days full of sunshine and play are right around the corner! But first, a big thank you to all the fantastic teachers!

  A simple notepad dressed up in Crumb Cake and Real Red, topped off with ribbon, is a great end-of-the-year thank you. A sweet treat made from the Top Note Die and a simple little 3 x 3 card complete with coordinating envelope finish off the set.

Begin with two Top Note Dies cut from Crumb Cake card stock. Score at 3/4" along bottom side of each. Overlap and adhere. Punch a 1" circle from lower right hand side. Punch a wing from Lucky Limeade using the Bird Builder Punch (leaf). I ran mine through the Crimper. I hand cut a stem. Add a simple tag. Use the 1/2" Circle Punch to create a space for the ribbon to tie. Candy in a cellophane bag create the "red apple". 


It doesn't get much simpler than this!
Crumb Cake, First Edition Specialty
DSP and Real Red. Top it off with a
little Linen Thread accented with
with a couple of hearts.

Coordinate envelope created from First Edition Specialty DSP. Begin with a 5" square, diagonally score each side @ 2-1/4" using the Simple Scored Diagonal Plate. Trim the little "V" at center point of each side. Fold each side in - voila! An envelope!

The "NOTES" on the notepad were created using the Billboard Strip Die 114510 and Big Shot! Machine.


Thursday, May 10, 2012

Clean and Simple - Ready for the Outdoors!

Clean and simple is my motto today. A sports themed card suitable for any age, for birthdays, just a "hi!" or whatever the occasion may be.  I used the Stripes Embossing Folder on an angle for a little added interest. Stampin' on the envelope gives a hint of what's inside.

To step it up a bit, you could easily change each stamped piece into a tag with a touch of twine or ribbon.  The Loads of Fun stamp set is only available until May 31st - order retiring stamp sets here.

Here's a peek at how the embossing was done.

Wednesday, May 9, 2012

Hearts and Birds

Just a quick little love note today - I ran a piece of burlap through the Big Shot! with the Hearts Collection Framelits Die. Added an embossed bird, a few flowers, pearls and ribbon - simple, simple!

I created a double border with Summer Smooches DSP using the Eyelet Border punch - love that punch! At first glance the Summer Smooches DSP is bright and packs a punch, but can easily be softened using neutrals. It's part of the sneak peek from the catalog launching June 1st.
Here's another idea using the Eyelet Border Punch - tags for sentiments created any length you choose! Begin with a piece of cardstock the desired width. Center piece in the border punch - repeat with opposite side. Cut apart using one eyelet as shown below or wider to create a border as shown in the card above.  
Click here for another idea! (check out the Thanks tag)

Tuesday, May 8, 2012

Happy Mother's Day! card

A few weeks ago I made a card similar (kind of) at a Stamp Club with Becky Roberts - I know, how fortunate am I to have her as my upline! I'm smiling!

So, while waiting for the new catalog, I'm using some papers that were favorites this year. Flirtatious DSP is among those! Have also been thinking of Mother's Day so here's today's card.

Supplies:
Wisteria Wonder, Whisper White, Flirtatious DSP
Basic Grey ink
Whisper White Taffeta ribbon
Vintage Wallpaper Embossing Folder
   Friendly Phrases stamp set 
Round Tab punch


I created the top of the dress using the Round Tab punch and re-punched it with the rounded side of the punch to create the sides of the bodice.
Skirt: Begin with a 4" x 2" piece of DSP. I scored at 1-3/4" and 2-1/4" to create the  center pleat, then scored 1/4" out from each of those score lines, but at a bit of an angle. Score again 1/2" out from those score lines, then at 1/4" once again at a bit of an angle. Trim sides of dress at an angle. Nothing fancy - just kind of did it as I went and forgot to take pictures. Oops! 

I would suggest working from the center out when scoring and then crease alternately front and back as you work towards the edge.

I think this would look great if the hem were trimmed with a bit of lace or tuille.... or something!   Enjoy!

Saturday, May 5, 2012

My Very First Challenge!


So, I've jumped in! I haven't done this before but today I decided "why not?" Why couldn't I participate in a challenge? Oh, you know, besides caring for a family, working part time, online school for myself and our teenager, cleaning house, and not least on my list - being a Stampin' Up! demonstrator!

One of my creative goals is to create "cleaner" cards - so this was the perfect opportunity for me. This is the card I submitted for the challenge from Freshly Made Sketches shown below. Come follow along and see what other amazing cards your fellow crafters have created.


I jazzed the flower up with a button and some pearls. As you can see I took some liberties with the sketch.... I used ribbon for the horizontal piece and a flower for the circle.


   Now here's the sketch that inspired it!


And now a few pictures so you can create this flower also.

Begin with seven 1-3/8" circles (any size will work it just changes your finished size flower)
Use one circle as the base and fold the remaining six as shown below.

Glue Dot all six folded circles to your base circle.Note that I alternated the direction I folded each circle so both colors show equally.
Embellish as desired!

Friday, May 4, 2012

Loads of Love!

Hasn't this just been the greatest stamp set ever?
I couldn't imagine not having it among my arsenal of stamps! So... just a few more cards with it - something simple, something fun!
I needed a few more quick notes for a few special guys in our lives and this works for me!


And then there's Loads of Fun! Life really is a road trip!

Supplies:
Crumb Cake, Early Espresso, Confetti Cream card stock
Early Espresso and Crumb Cake ink
Loads of Love 115022
Loads of Fun 115197
Wheel - sorry, didn't realize it was no longer available but a good substitute would be:
Sandy Speckles 117651

To add a little interest I scored at 1/4" and 1/2" from center fold of card. I love working with burlap! I could see this card with a flower on the front instead of all these guy toys - oh, gotta run and try that!

Don't forget! These stamp sets are only available until the end of May, so order yours today!