Showing posts with label Creative Elements. Show all posts

Thursday, May 3, 2012

A New Card for You!


Yesterday I was looking at my Linen Thread and the cardboard piece it comes on - looks kind of like a spool. That started this card! Funny how things like that happen, isn't it?

We tend to see cards everywhere... a purse, a painting, a piece of furniture, a flower.

Ever have a new card pop into your mind just as you are going to sleep? Now, that makes for easy sleep!

So this card is for each of you who sew (or would like to sew!) topped off with a touch of froufrou. It's also a nice way to pass on a bit of lace or ribbon.


  I love using fabric in my Big Shot! machine and this flower was created that way. Four layers of Beau Chateau Designer Fabric 122336 and two layers of tuile were cut using the Scallop Circle #2 Die. Top the flower off with a couple of buttons and a little Linen Thread (which I really felt deserved being on the card as it was my inspiration in the first place!)  

Directions: 
Create a template by using a piece of cardstock 3" x 4".
1)  Score along both short ends at a 1/2" and 1" (dotted lines)
2) Score at 1/2" on both long sides just between the two 1" score lines.
3) Cut on solid lines.
I created a template first. I then folded a piece of cardstock 3" x 8" in half to create a 3" x 4" card and used the template to mark my card in pencil; then cut through both layers.

Stamp card front using Early Espresso ink and the Creative Elements stamp set.
Wrap Victoria Crochet Trim 118481 (or your favorite ribbon) around spool securing at back with a Glue Dot and on front with an Antique Brass safety pin.


On Very Vanilla card stock, stamp sentiment, then create banner end by using a Square Punch.

Stamp butterflly in Crumb Cake ink.
Stamp "No. 3" using Early Espresso ink.
Cut out with 1" Circle punch.
Adhere to card front using a Stampin' Dimensional.
Note: It's always easiest to stamp first, then punch!


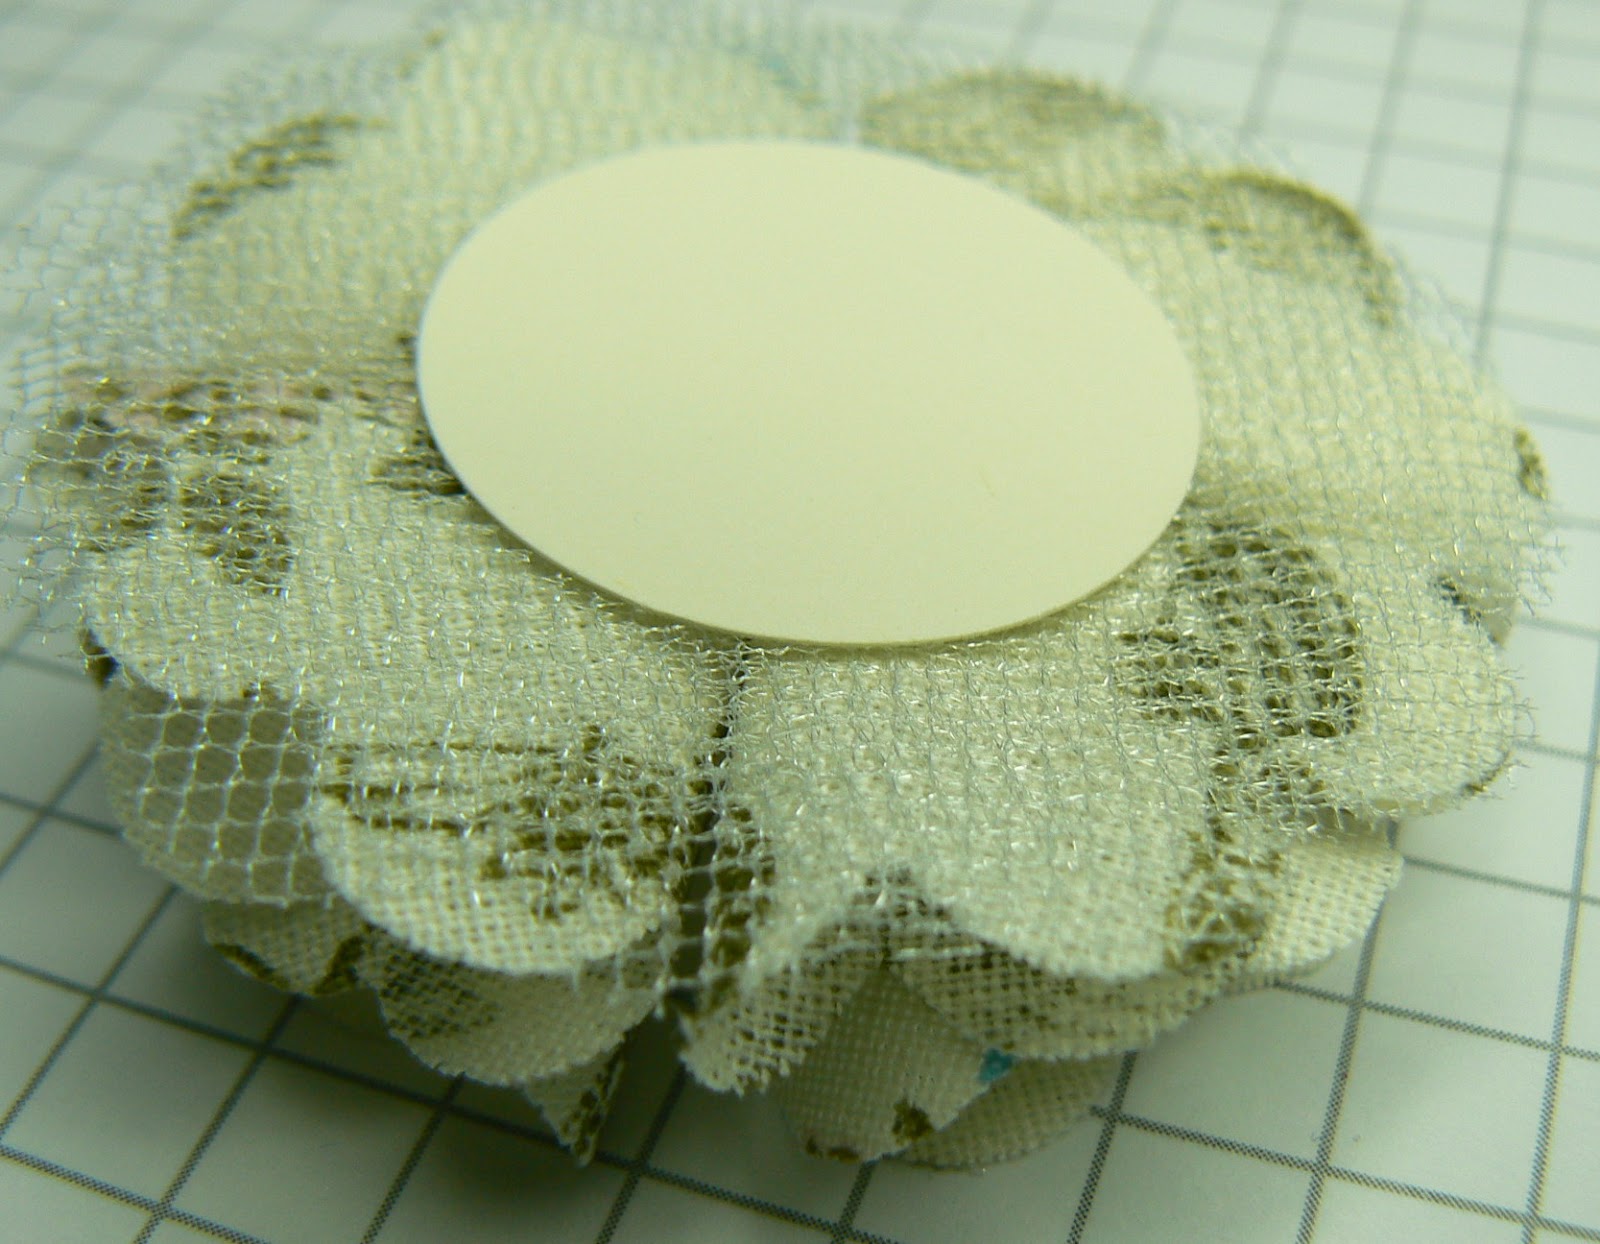
Using the Circle Scallop #2 Die, cut four pieces of Beau Chateau fabric and two layers of tuille.

Adhere tuille to a 1" circle of card stock using Glue Dots. Fold fabric flowers into fourths and adhere on tuille with Glue Dots. Here's a picture of the complete underside.


Supplies:                                                                            Tools:
Crumb Cake card stock   120953   3" x 8"                    Big Shot!                                    113439
Victoria Crochet Trim       118481   18"                         Scallop Circle #2 Die                113469
Vintage Trinkets                118764  (safety pin)             Creative Elements stamp         122645 w
Early Espresso Ink            119670                                                                                       122647 c
Beau Chateau Fabric       122336  4 - 3" squares        1" Circle Punch                          119868
Designer Buttons              119743 Neutrals  (1)                 
                                            119747 Brights    (1)
Linen Thread                     104199  6"
Always Artichoke
seam binding                    121000  6"  
Basic Pearls                     119247  (3)                                           

Monday, August 8, 2011

Vintage Coffee Cup gift card holder & gift tags, too!


Happy Monday afternoon to each of you that follow my blog!

I've been playing around with a coffee cup pattern I originally saw as a video tutorial on Confessions of a Stampin Addict. 

I made mine as a card that opens the traditional way. I now have a stash of them! My favorite is this "vintage" one I created for a special friend of mine who lives miles away. We are long overdue for a coffee chat, friend!! I loved it so much I decided to make some the size of a gift tag.   And I'm still thinking.... how about a coffee cup Christmas tree ornament?  Does your brain ever get like that - it's racing with ideas faster than you can possibly create them? Gotta love it!!  So although this project was not my original idea I will give you the dimensions I used along with a few simple changes I made. 

So how 'bout we share a cup of coffee as we get started. Go on, I'll wait while yours brews!                                                                                                                                                                                                           

Supplies: 
Creative Elements stamp set
Cherry Cobbler, Early Espresso ink   
CherryCobbler, Crumb Cake, Early Espresso and Whisper White card stock  
Crumb Cake seam binding #122332 
Pearls #119247  
Large Oval Scallop Punch #119855  
Scallop Oval  Punch  #119856
Corner Punch #119871   
Crimper #101618  
Perfect Polka Dots embossing folder #117335  
Elegant Lines embossing folder #119277 
Stampin' Dimensionals

For gift card holder:
Crumb Cake c/s - Cut one piece 8-1/2 x 3-1/4 (you can get 3 from one piece of c/s!)
Fold in half to create a 4-1/4" x 3-1/4" card.
Along what would be the bottom of the card, measure in 1/2" from each side and mark using the scoring tool on your cutter.
Fold card in half and lay along cutter as shown:
Now cut a wedge off each long side, starting at the top folded edge, down to the 1/2" mark as shown above. Repeat on opposite side of card to create a "coffee cup" shape.

Stamp flower from Creative Elements stamp set randomly on "cup" front using Cherry Cobbler ink. 

 Emboss front of card only using the Elegant Lines embossing folder.

From Whisper White c/s, cut a piece 3-1/2" x 1-1/2", fold in half lengthwise and round off both bottom corners with the Corner punch to create the "lid". Run "lid" through the Perfect Polka Dots embossing folder.
Adhere in place over top of card using Sticky Strip (love that stuff!).  

From Cherry Cobbler: Cut one piece 1" x 3-1/2". Run through crimper to create "band". Adhere in place. Trim edges to fit "cup".

Your "cup" should look like this! How'd it go?

Cut 7" of Crumb Cake seam binding. Adhere around band with the cut ends meeting in the center on front of the cup. This way they'll be covered by the embellishment.

Using Early Espresso ink, stamp sentiment on Whisper White c/s and then cut out using large oval punch.
Using Early Espresso card stock, cut out one scalloped oval. Adhere in place at center of band.
Using Stampin' Dimensionals adhere sentiment in place.
Adhere pearls in place.
You're done!  Isn't it cute?  Hope you didn't spill your coffee!!


NOTE: For gift tags begin with a "cup cut 2-3/4" x 3-1/2'. Directions remain the same.