

Yesterday I was looking at my Linen Thread and the cardboard piece it comes on - looks kind of like a spool. That started this card! Funny how things like that happen, isn't it?
We tend to see cards everywhere... a purse, a painting, a piece of furniture, a flower.
Ever have a new card pop into your mind just as you are going to sleep? Now, that makes for easy sleep!
So this card is for each of you who sew (or would like to sew!) topped off with a touch of froufrou. It's also a nice way to pass on a bit of lace or ribbon.

I love using fabric in my Big Shot! machine and this flower was created that way. Four layers of Beau Chateau Designer Fabric 122336 and two layers of tuile were cut using the Scallop Circle #2 Die. Top the flower off with a couple of buttons and a little Linen Thread (which I really felt deserved being on the card as it was my inspiration in the first place!)
Directions:
Create a template by using a piece of cardstock 3" x 4".
1) Score along both short ends at a 1/2" and 1" (dotted lines)
2) Score at 1/2" on both long sides just between the two 1" score lines.
3) Cut on solid lines.

I created a template first. I then folded a piece of cardstock 3" x 8" in half to create a 3" x 4" card and used the template to mark my card in pencil; then cut through both layers.

Stamp card front using Early Espresso ink and the Creative Elements stamp set.
Wrap Victoria Crochet Trim 118481 (or your favorite ribbon) around spool securing at back with a Glue Dot and on front with an Antique Brass safety pin.

On Very Vanilla card stock, stamp sentiment, then create banner end by using a Square Punch.

Stamp "No. 3" using Early Espresso ink.
Cut out with 1" Circle punch.
Adhere to card front using a Stampin' Dimensional.
Note: It's always easiest to stamp first, then punch!

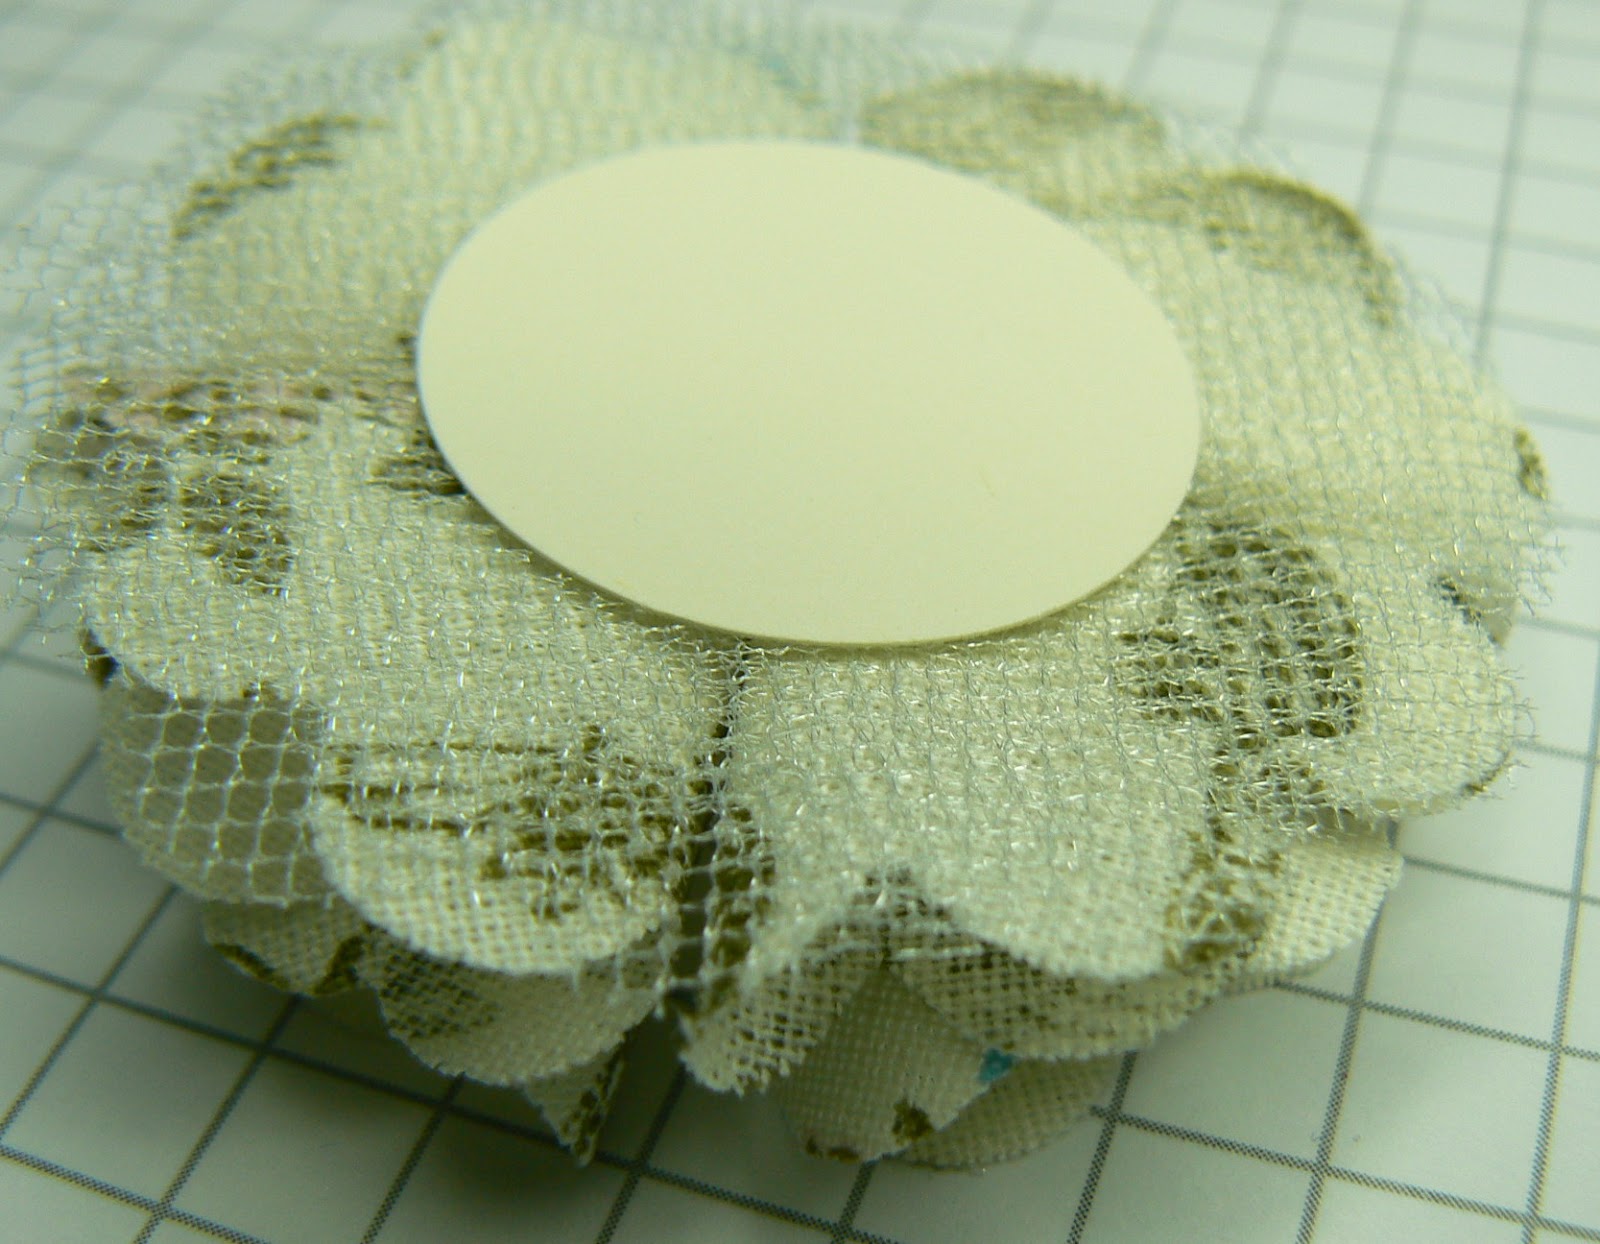
Using the Circle Scallop #2 Die, cut four pieces of Beau Chateau fabric and two layers of tuille.
Adhere tuille to a 1" circle of card stock using Glue Dots. Fold fabric flowers into fourths and adhere on tuille with Glue Dots. Here's a picture of the complete underside.
Supplies: Tools:
Crumb Cake card stock 120953 3" x 8" Big Shot! 113439
Victoria Crochet Trim 118481 18" Scallop Circle #2 Die 113469
Vintage Trinkets 118764 (safety pin) Creative Elements stamp 122645 w
Early Espresso Ink 119670 122647 c
Beau Chateau Fabric 122336 4 - 3" squares 1" Circle Punch 119868
Designer Buttons 119743 Neutrals (1)
119747 Brights (1)
Linen Thread 104199 6"
Always Artichoke
seam binding 121000 6"
Basic Pearls 119247 (3)


