Oh my! In the last magazine Stampin' Up! published specifically for their demonstrators (all kinds of perks!) they gave directions for a treat box that I thought was too cute!
However, as often happens, when I get an idea it ends up being quite different from the original and this project was no different. First, I thought I would do the entire box using Window Sheets so you could see all the goodies inside - but I happened to be out and had to place an order for more.... so, while I was waiting I used the very last little bit of Mocha Morning (polka dot) I had left to create this delightful little number. You kind of hold your breath when you use the last of something - ever done that?
This treat box is filled with chocolate covered coffee beans - yummy!
Here are the directions as I made it:
Cardstock:
Mocha Morning DSP 122366 (1) 4" x 6-1/2"
(2) 3-1/2" x 3-1/2"
Pear Pizazz card stock 119795 (1) 3-1/2" x 4-1/2"
Very Vanilla card stock 101650 (1) 2-1/2" x 6"
Early Espresso card stock 119686 (1) 4" x 4"
Window Sheets 114323 (1) 1-1/8" x 4"
Ink:
Sahara Sand 105208
Embellishments:
Brads, Brights 119740 (1)
Chocolate Chip Satin Ribbon 124327 (10")
Tools:
Big Shot! Machine 113439
Island floral Die 118871
Scallop Circle #2 Die 113469
Bird Builder Punch 117191
Blossom Bouquet Triple Layer
Punch 122464
Crop-a-dile 108362
3/4" Circle Punch 119873
Paper Snips 103579
Sticky Strip 104294
Stampin' Dimensionals 104430
Glue Dots 103683
Bone Folder 102300
Stampin' Sponge 101610
Directions:
1) Score Mocha Morning DSP at 1-1/8", 2-1/4", 3-3/8", 4-1/2" and 5-5/8".
2) Using the 3/4" Circle Punch, punch one hole centered between the 2-1/4" x 3-3/8" score
lines, with the punch placed as far in as paper will allow. Refer to picture below.
3) Using Snail Adhesive, adhere Window Sheet to back side of 3/4" hole.
5) Using Mocha Morning DSP (3-1/2" x 3-1/2") cut two flowers using the Big Shot! Machine
and the Island Floral Die. With Crop-a-dile, punch 1/4" hole through the center of one flower
to accomodate ribbon. the other flower is for the bottom and will have a tiny hole in it which
was created by the die. It shouldn't be a problem - you can always put your "created by"
sticker over it if you want to hide it. That's what I did :)
6) Using Bone Folder, crease each petal on both flowers so they each form a hexagon.
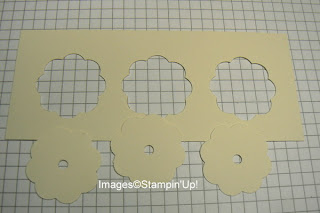
7) Using the Blossom Bouquet Triple Layer Punch and Very Vanilla card stock, punch out three flowers using the setting that creates a solid flower. Punch 1/4" holes in center of each flower
using Crop-a-dile.
8) Using Paper Snips, cut each flower to create petals as pictured below. Sponge front and
back of flowers using Sahara Sand ink and Stampin' Sponge. Use Bone Folder to curve
petals. Changes the look of them quickly, doesn't it?
9) Using Pear Pizazz card stock and the Bird Builder Punch, punch out three sets of leaves.
Conserve paper as shown below. Adhere leaves to top of treat holder with Glue Dots.
10)Adhere flowers to top of treat box using Glue Dots. Tie ribbon through to create a loop and
secure with a knot underneath top.
11) Apply Sticky Strip on inside of each petal on both DSP flowers and adhere one to top of
box - fill box with treats and adhere the final flower to the bottom of box.
12) Using Early Espresso card stock and the Scallop Circle #2 Die cut out one of the large
scalloped circles. Adhere to bottom of box using Sticky Strip.


No comments:
Post a Comment